Product Features
- Complete Kit: Includes hatching box, cover, ring, net, collecting cup, suction cup, spoons, and droppers.
- Easy Installation: Fix the hatching tray with a suction cup to float on the water surface.
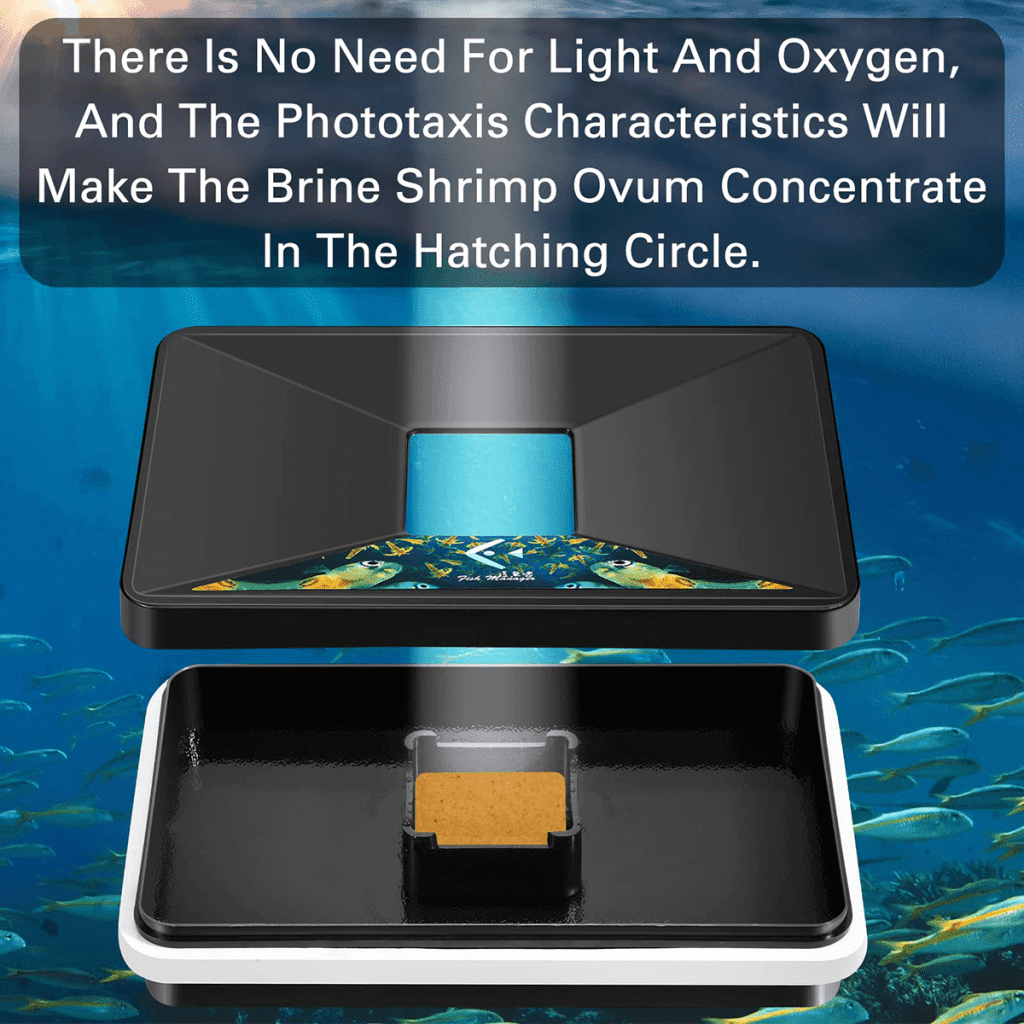
- Efficient Hatching: No oxygen needed; uses phototaxis to concentrate brine shrimp in the center.
- Reusable Tools: All tools are durable and can be reused after cleaning.
- Optimal Temperature: Incubate at 26-28°C (78.8-82.4°F), not exceeding 30°C (86°F).
Step-by-Step Instructions
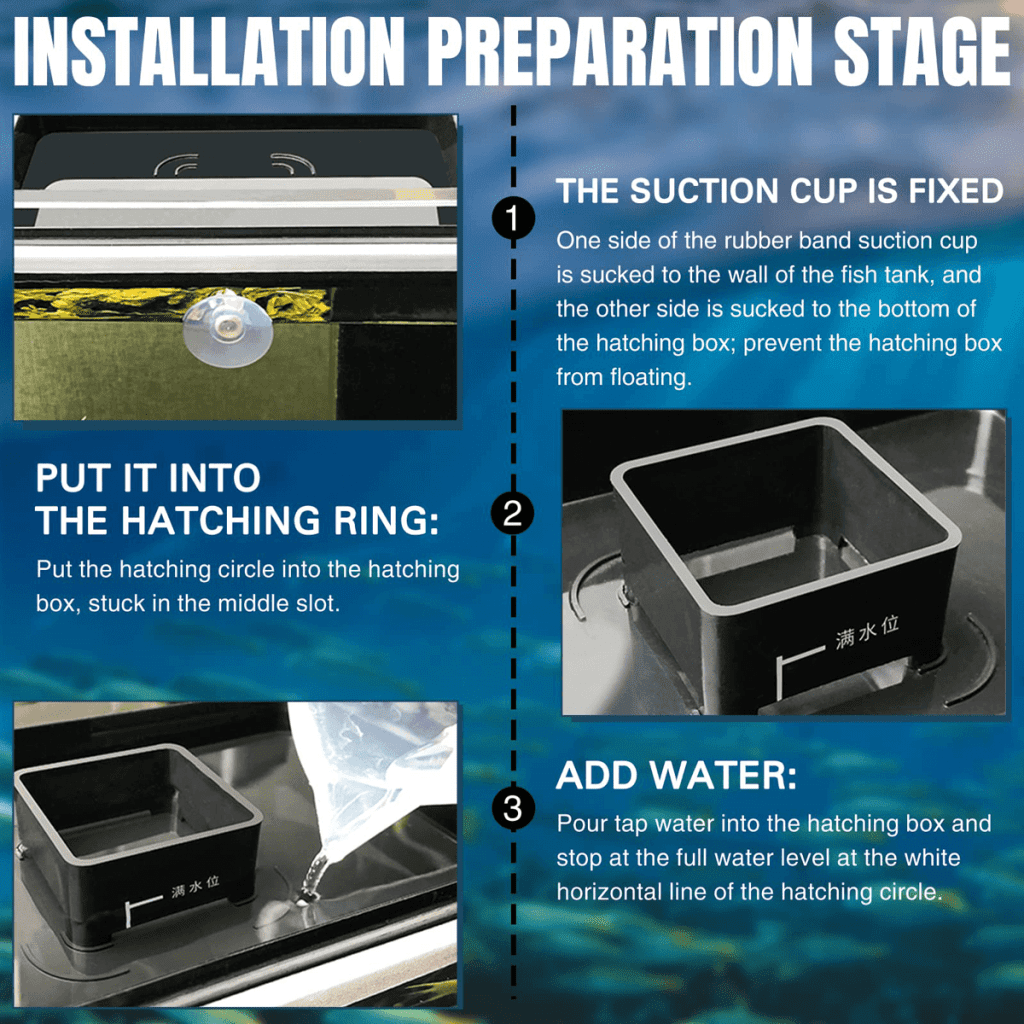
Fix the Suction Cup:
- Attach one side of the rubber band suction cup to the wall of the fish tank.
- Attach the other side to the bottom of the hatching box to prevent it from floating.
Insert the Hatching Ring:
- Place the hatching ring into the hatching box.
- Ensure it is securely positioned in the middle slot.
Add Water:
- Pour tap water into the hatching box.
- Stop filling once the water level reaches the white horizontal line on the hatching ring.
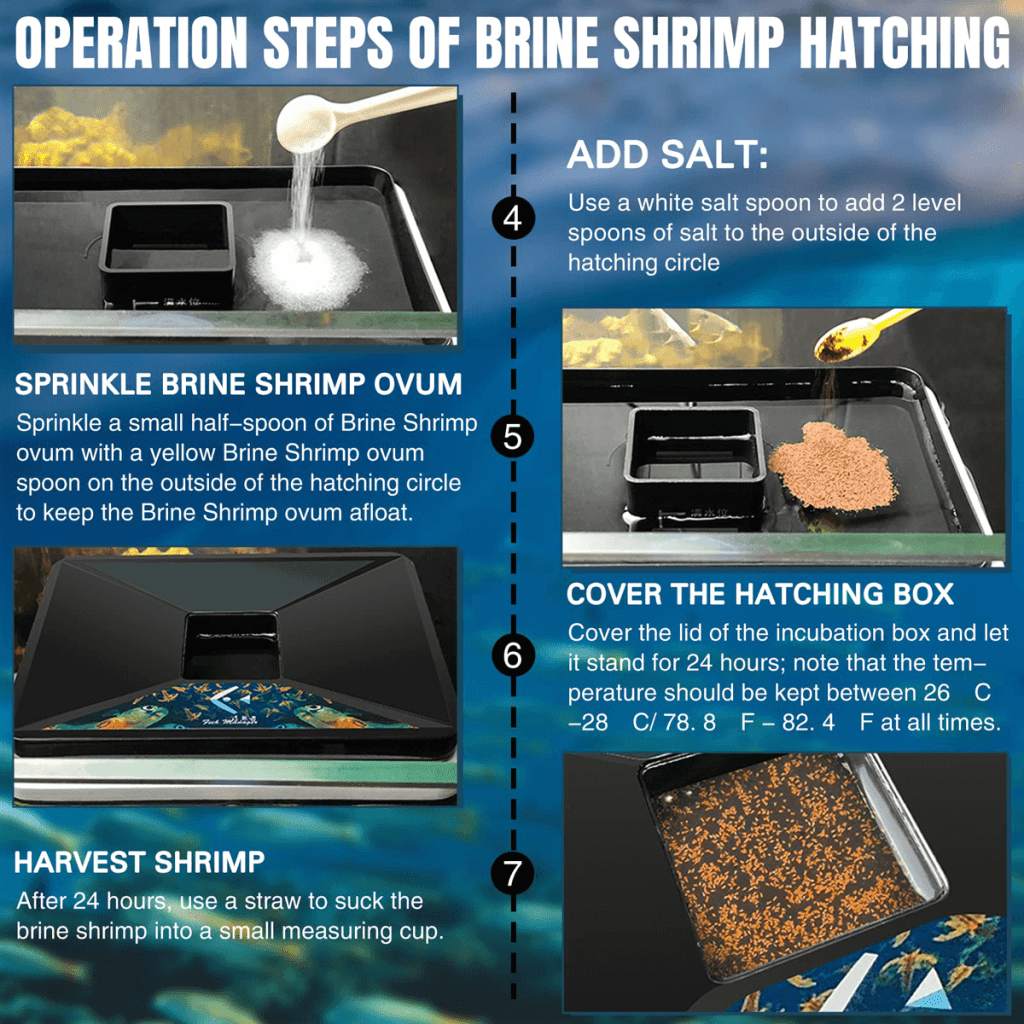
Add Salt:
- Use the provided white salt spoon to add 2 level spoons of salt to the water outside the hatching ring.
Sprinkle Brine Shrimp Eggs:
- Use the yellow brine shrimp egg spoon to sprinkle a small half-spoon of brine shrimp eggs outside the hatching ring.
- Ensure the eggs remain afloat.
Cover the Hatching Box:
- Place the lid on the hatching box.
- Let it stand for 24 hours, maintaining a temperature between 26-28°C (78.8-82.4°F).
Harvest the Shrimp:
- After 24 hours, use the provided straw to collect the brine shrimp.
- Transfer the shrimp into the small measuring cup for feeding or storage.
Image version
