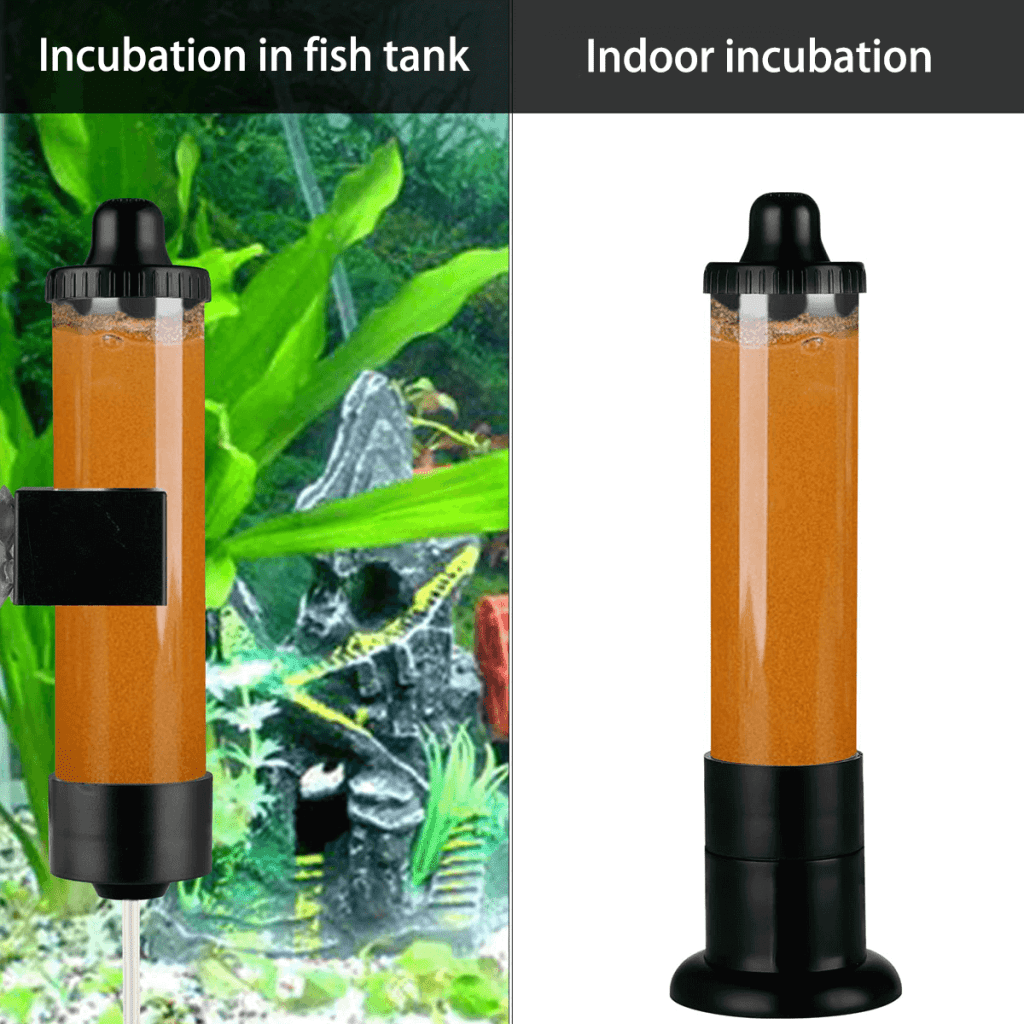
Product Features
- Versatile Use: Suitable for both indoor and aquarium hatching.
- High-Quality Material: Made of premium acrylic, it is sturdy, odorless, shatter-resistant, and long-lasting.
- Easy to Use: Complete with all necessary accessories and compatible with an oxygen pump, it is user-friendly even for beginners.
- Recommended Temperature: Best used at 25-30°C (77-86°F), with an optimal temperature of 28°C (82°F).
- Recommended Capacity: Use 250ml (8.5 fl oz) of water with 1g (1/32 oz) of brine shrimp eggs and 5g (1 tsp) of sea salt.
Step-by-Step Instructions
Unpack the Hatchery: Remove the brine shrimp hatchery from its packaging.
Install the Oxygen Tube:
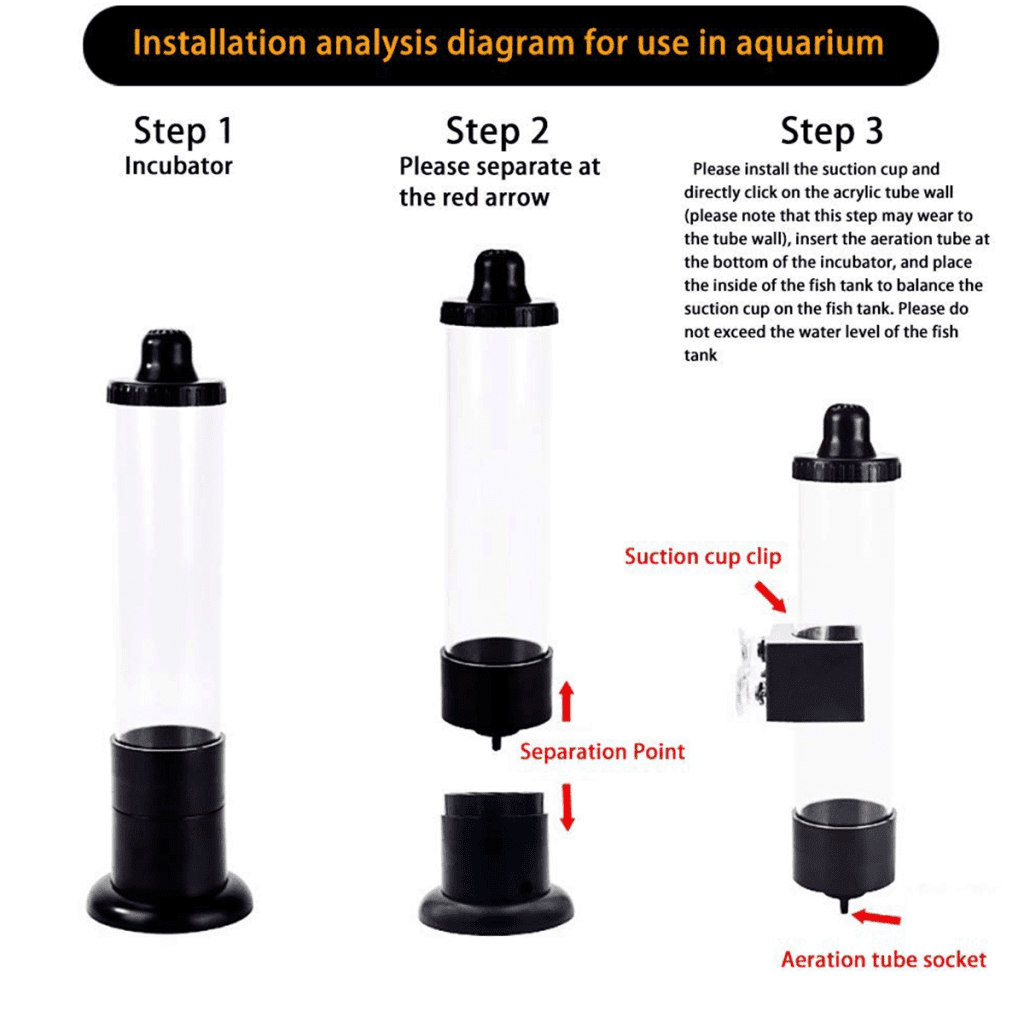
- Detach the bottom part of the hatchery as indicated in the included diagram.
- Insert the oxygen tube into the bottom of the hatchery.
- Place the hatchery inside your aquarium and secure it with the suction cups to the side of the aquarium. Ensure that the water level in the aquarium does not exceed the lid of the hatchery.
Attach the Suction Cups:
- Install the suction cups by clipping them directly onto the acrylic tube.
- Note: Using this feature may cause some wear on the tube’s exterior.
Add Water, Eggs, and Salt:
- Pour 250ml of water into the hatchery.
- Add approximately 1g of brine shrimp eggs.
- Add 5g of sea salt to the water.
Connect the Air Pump:
- Attach the air pump to the oxygen tube.
- Turn on the air pump and ensure continuous oxygen supply for 24 hours.
Harvest the Brine Shrimp:
- After 24 hours, turn off the air pump.
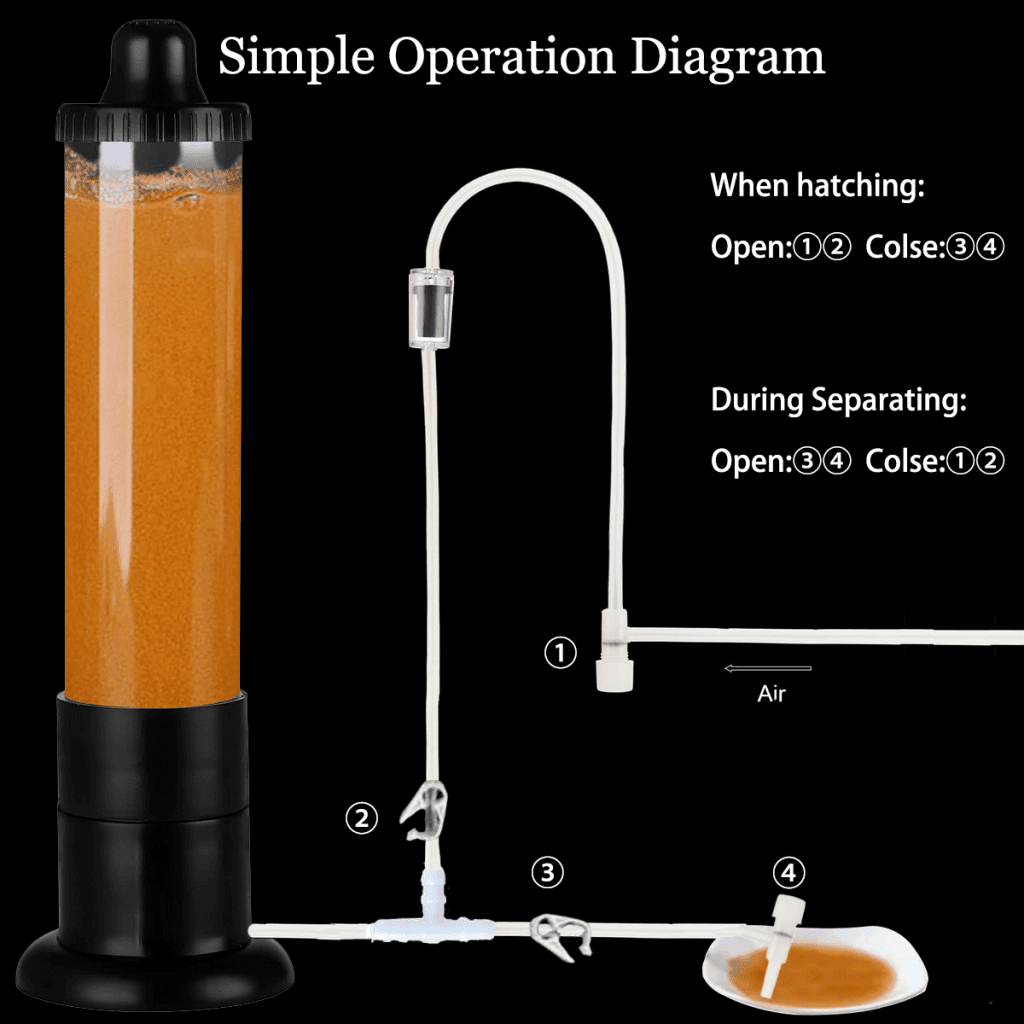
- Open the harvesting tube to separate the hatched brine shrimp larvae from the unhatched eggs.


You can assemble the accessories as shown in the following diagram

This user manual ensures a smooth and efficient process for hatching brine shrimp, making it easy for both beginners and experienced aquarium enthusiasts. By following these steps, you will achieve optimal results with your brine shrimp hatchery.

